
Becky Krystal
THE WASHINGTON POST – At hotel breakfasts, fancy brunches or even the college dining hall, the omelette station always felt like the height of luxury to me. Omelettes hold a revered, almost mythical position in popular and culinary culture as well, whether it’s the hypnotic comfort of famed French chef and cookbook author Jacques Pépin demonstrating his recipe or watching Helen Mirren’s character discover the bliss of a masala omelette made by the aspiring chef played by Manish Dayal in The Hundred-Foot Journey.
But cooking a great omelette at home needn’t be shrouded in mystery. If you already feel confident about your scrambled eggs, you’re most of the way there. In CookWise, Shirley O Corriher explained: “Basically, omelettes are glorified scrambled eggs. They start out the same way, and then, when the eggs are partially set but still juicy, they are folded over.”
For me, that advice is exemplified by this Classic Folded Omelette, a mash-up of recipes from chef and cookbook author Michel Roux and cookbook author J Kenji López-Alt, along with some of my personal tweaks.
Think of it as a cross between a French omelette and a diner-style omelette. It has the smooth and custardy texture of the French version, with the folded appearance and filling versatility of what you might get at a casual restaurant. To me, it’s the best of both worlds.
Here are some of the keys to its success, which can help with your omelettes whether you make this specific recipe or not.
Picking the right skillet. There are two parts to this. Eggs are prone to sticking because in their liquid form they can flow into any microscopic surface imperfections, Corriher said.
For this reason, I turn to my nonstick skillet. If you have a well-seasoned cast-iron pan you’re confident the eggs won’t stick to, by all means use it.
The other half of the equation is choosing the right size pan for the job. I’m really loving my new eight-inch skillet for individual or two-serving omelettes. It keeps the eggs from spreading too thin and overcooking. It’s also very easy to manoeuvre. If you’re looking for bigger omelettes to share, consider using a 10-inch for four or five eggs and moving up to 12 inches for six or more eggs.
Salting. López-Alt is the one who sold me on salting eggs a little bit in advance of when you cook them. This gives the salt time to dissolve evenly so that it can act as the most efficient buffer between the egg proteins and prevent them from binding too tightly. When that happens, moisture is squeezed out and you get tough, rubbery eggs. If you forget to salt in advance, adding it right before the eggs go into the pan is okay. But if you think to add the salt at the same time you start preheating the pan, you’ll be golden. Speaking of preheating…
Be patient, then work quickly. A sufficiently preheated skillet will help guard against sticking, so that the eggs start cooking as soon as they hit the pan. As Cook’s Illustrated notes, preheating your pan slowly leads to a more even heat across the whole pan – and gives you a larger window for adding your eggs without overcooking them.
While the magazine recommends low heat, I prefer medium for a slightly quicker but no less even result. When using medium-high heat, I found more colour variation in the omelette than I wanted, as well as a tendency for overcooking. If you’re a confident cook who likes a bit more puff and colour to the omelette, you can use medium-high so long as you take the higher heat into account with your timing.
Here’s where the working quickly part comes in. Once your pan has been preheated, and you pour in the egg, it’s time to embrace the speed.
Quickly stir the eggs to further distribute the heat and get all of them cooking. Once curds start to form, stop. Rapidly work your way around the pan, lifting the edge of the set eggs and tilting the skillet so that the liquid runs into the gaps on the sides. This method gives you a smooth, pretty exterior. The whole process should take no more than a minute and a half.
Mind the fillings. Because the omelette itself sets so quickly, López-Alt said, any fillings that need to be softened should be completely or mostly cooked in advance, as they won’t cook through while atop the eggs. You can do this in the skillet while your salted eggs rest in a bowl or in a separate skillet. Mixing the warm ingredients with the cheese will help jump-start melting, too. Then scatter your filling over half the eggs while they’re still in the pan just before you remove it from the heat.
Let the eggs finish off heat. After you’re done with the tilting step, let the skillet stay on the heat until the eggs are almost completely set. They will still look wet but should not be runny.
This is the point where it’s easy to let the eggs overcook, which is why I like López-Alt’s suggestion to remove the pan from the heat and then cover the skillet to let the eggs finish in the residual heat. Simply fold in half (or thirds, if that’s your thing) and serve. The result: a creamy, custardy omelette.
You may need to practice and tweak, but it won’t be long before you have your own omelette station at home.
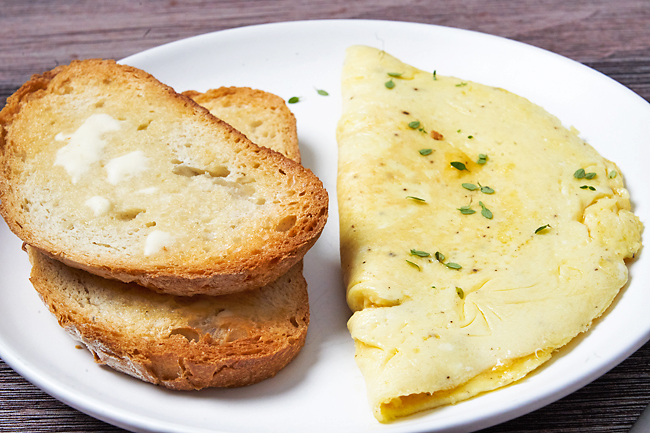
CLASSIC DINER-STYLE OMELETTE
15 minutes
One to two servings
INGREDIENTS
Three large eggs
Fine salt
Freshly ground black pepper
One tablespoon unsalted butter
Fresh herbs for garnish, such as thyme leaves, minced chives or chopped parsley (optional)
DIRECTIONS
Break the eggs into a small bowl, season lightly with salt and pepper and, using a fork, lightly whisk to combine. Let them rest for at least 10 minutes (15 is even better) while you heat the skillet and prepare any possible fillings. Salting in advance helps keep the eggs tender during cooking.
Heat an eight-inch nonstick skillet over medium heat. Be sure you give it enough time to ensure the eggs start cooking right away. A few drops of water flicked on the surface should skitter and evaporate immediately. Add the butter to melt, swirling it to coat the bottom and sides of the pan.
Pour the eggs into the skillet and let the mixture set for 10 to 20 seconds, then use a spatula to start agitating the mixture, stirring until some curds begin to form. Lift the edges of the coagulated egg and tilt the pan to let the uncooked egg fill in the gaps. Repeat the process as you work your way around the entire pan. This part should take no more than 60 to 90 seconds. When the omelette has set on the bottom but still looks slightly wet but not runny on top, pull the pan off the heat and cover it with a tightfitting lid or plate. Let rest until the eggs have reached your desired consistency, one to two minutes.
Use a spatula to fold the omelette in half and transfer to a plate. Sprinkle the herbs on top, if using, and serve hot.