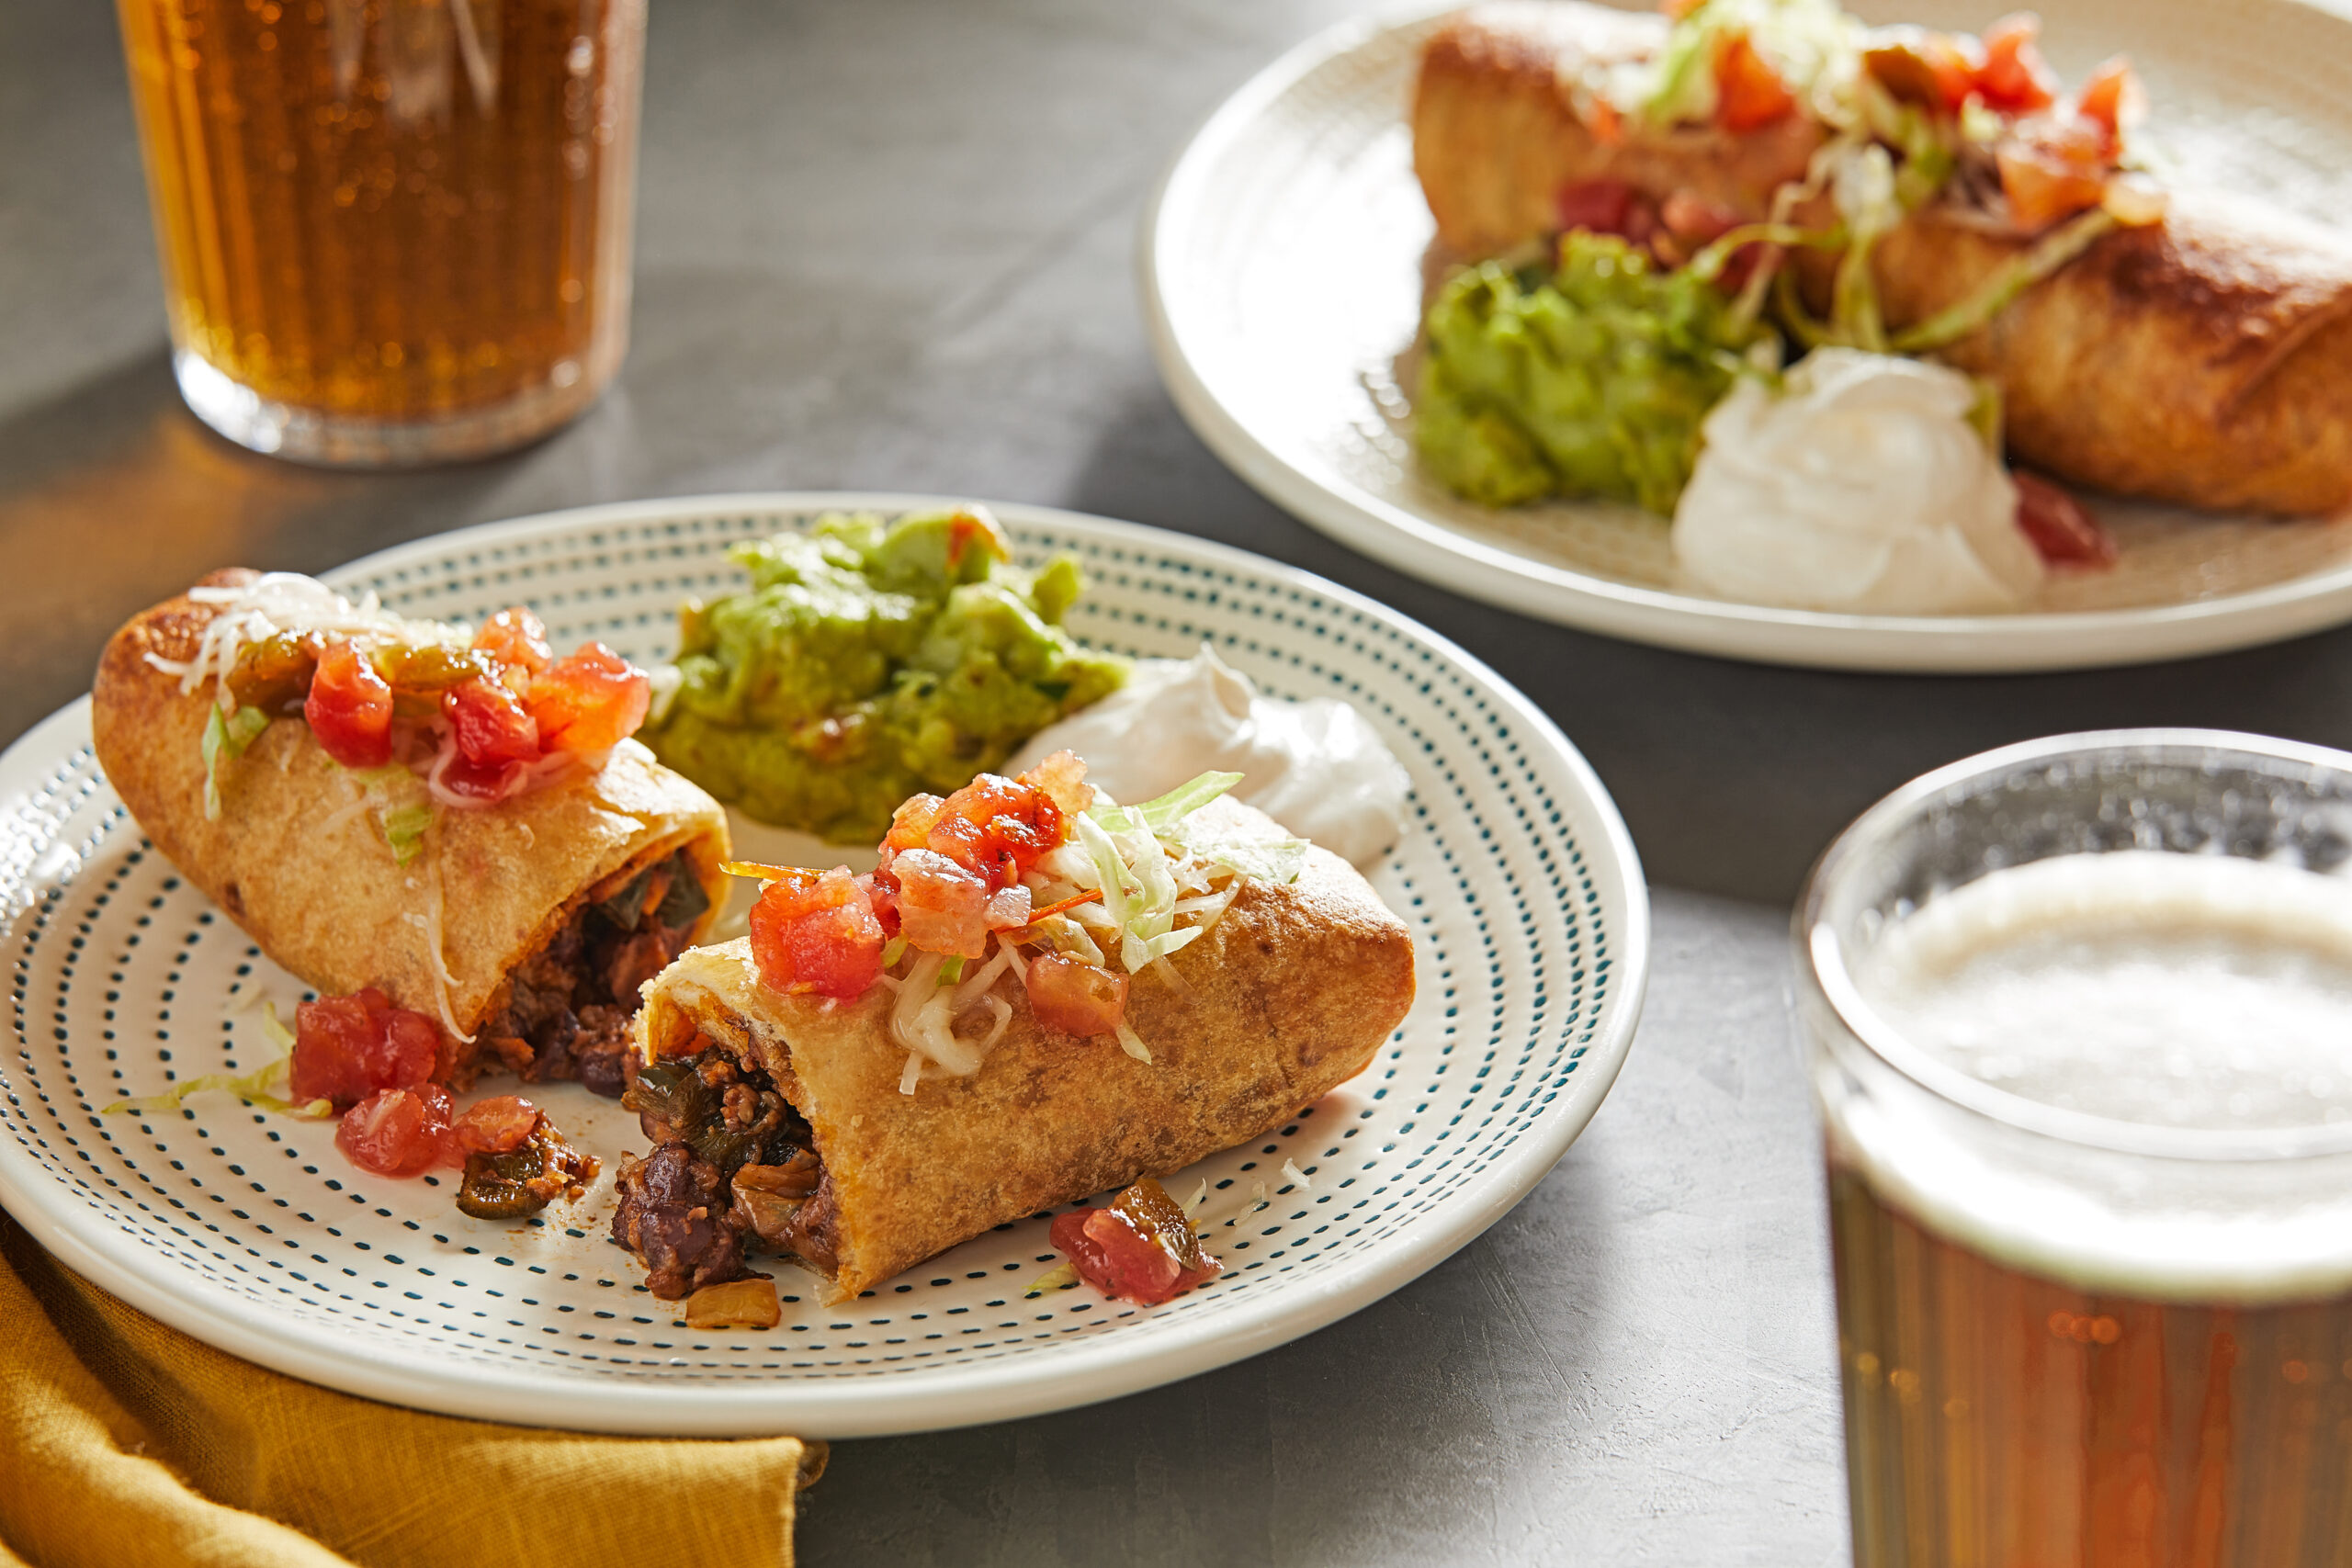
THE WASHINGTON POST – One of my favourite food-origin stories is that of the chimichanga, the fried burrito that Tucson claims as its most famous dish.
I’ll let El Charro Café, established in 1922 in Tucson, tell it: “Our Legendary Tia Monica Flin is well-known as ‘The Inventor of The Chimichanga,'” reads the restaurant’s website.
“While frying her now famous El Charro ground beef tacos, she accidentally dropped a burro into the frying pan and when the oil splashed up she was about to lash out a common Spanish cuss word starting with ‘Ch’ but because she was among her young nieces and nephews, changed it to ‘Chimichanga,’ the equivalent of ‘thingamajig.’
Thankfully for all of us, Monica was a controlled and creative cuss.”
Thankfully, indeed. Imagine what chimichangas might be called had she not been so controlled.
This isn’t even the only origin story; a Phoenix restaurant claims to have invented chimichangas in 1946. Meanwhile, scholars note that cooks in Arizona’s just-across-the-border region of Sonora, Mexico, have long enjoyed a similar dish.
“People don’t know: Is it American? Is it Mexican?” my friend Pati Jinich said about the chimichanga in an April appearance on “Good Morning America” to promote the second season of her public television series, “La Frontera.”
The show focuses on the cross-cultural culinary connections (say that five times fast) of US-Mexico border communities, and the chimichanga is a poster child for those ties, along with burritos and nachos. “Both countries claim it as their own,” Jinich said. “And it’s really part of that third country, third culture that everybody loves, that mesh between the US and Mexico.”
As someone who hails from West Texas, I know firsthand the delicious foods that result when American and Mexican traditions intertwine. Tex-Mex restaurants were virtually the only ones we visited when I was growing up, unless my steak-loving father happened to be visiting from Chicago.
As it happens, the chimichanga has taken hold in Texas, too, and why wouldn’t it? Perhaps the only way to improve on a great burrito is to give it a swim in hot oil.
Everyone has opinions about what does and doesn’t belong in a burrito, so the same is true for the chimichanga. I wanted to make a vegetarian one, naturally, so I went with a combination of black beans, poblano chiles and cheese that comes together quickly in a skillet.
In Arizona, “chimis” can be gigantic, but I wanted something a little more manageable, if only to keep the nutritional analysis – and therefore my waistline – in check.
So I used 10-inch flour tortillas rather than the 12-inchers that make for burritos the size of my forearm. (Pro tip: If you want to reduce the sodium in a burrito, look online for low-sodium flour tortillas.)
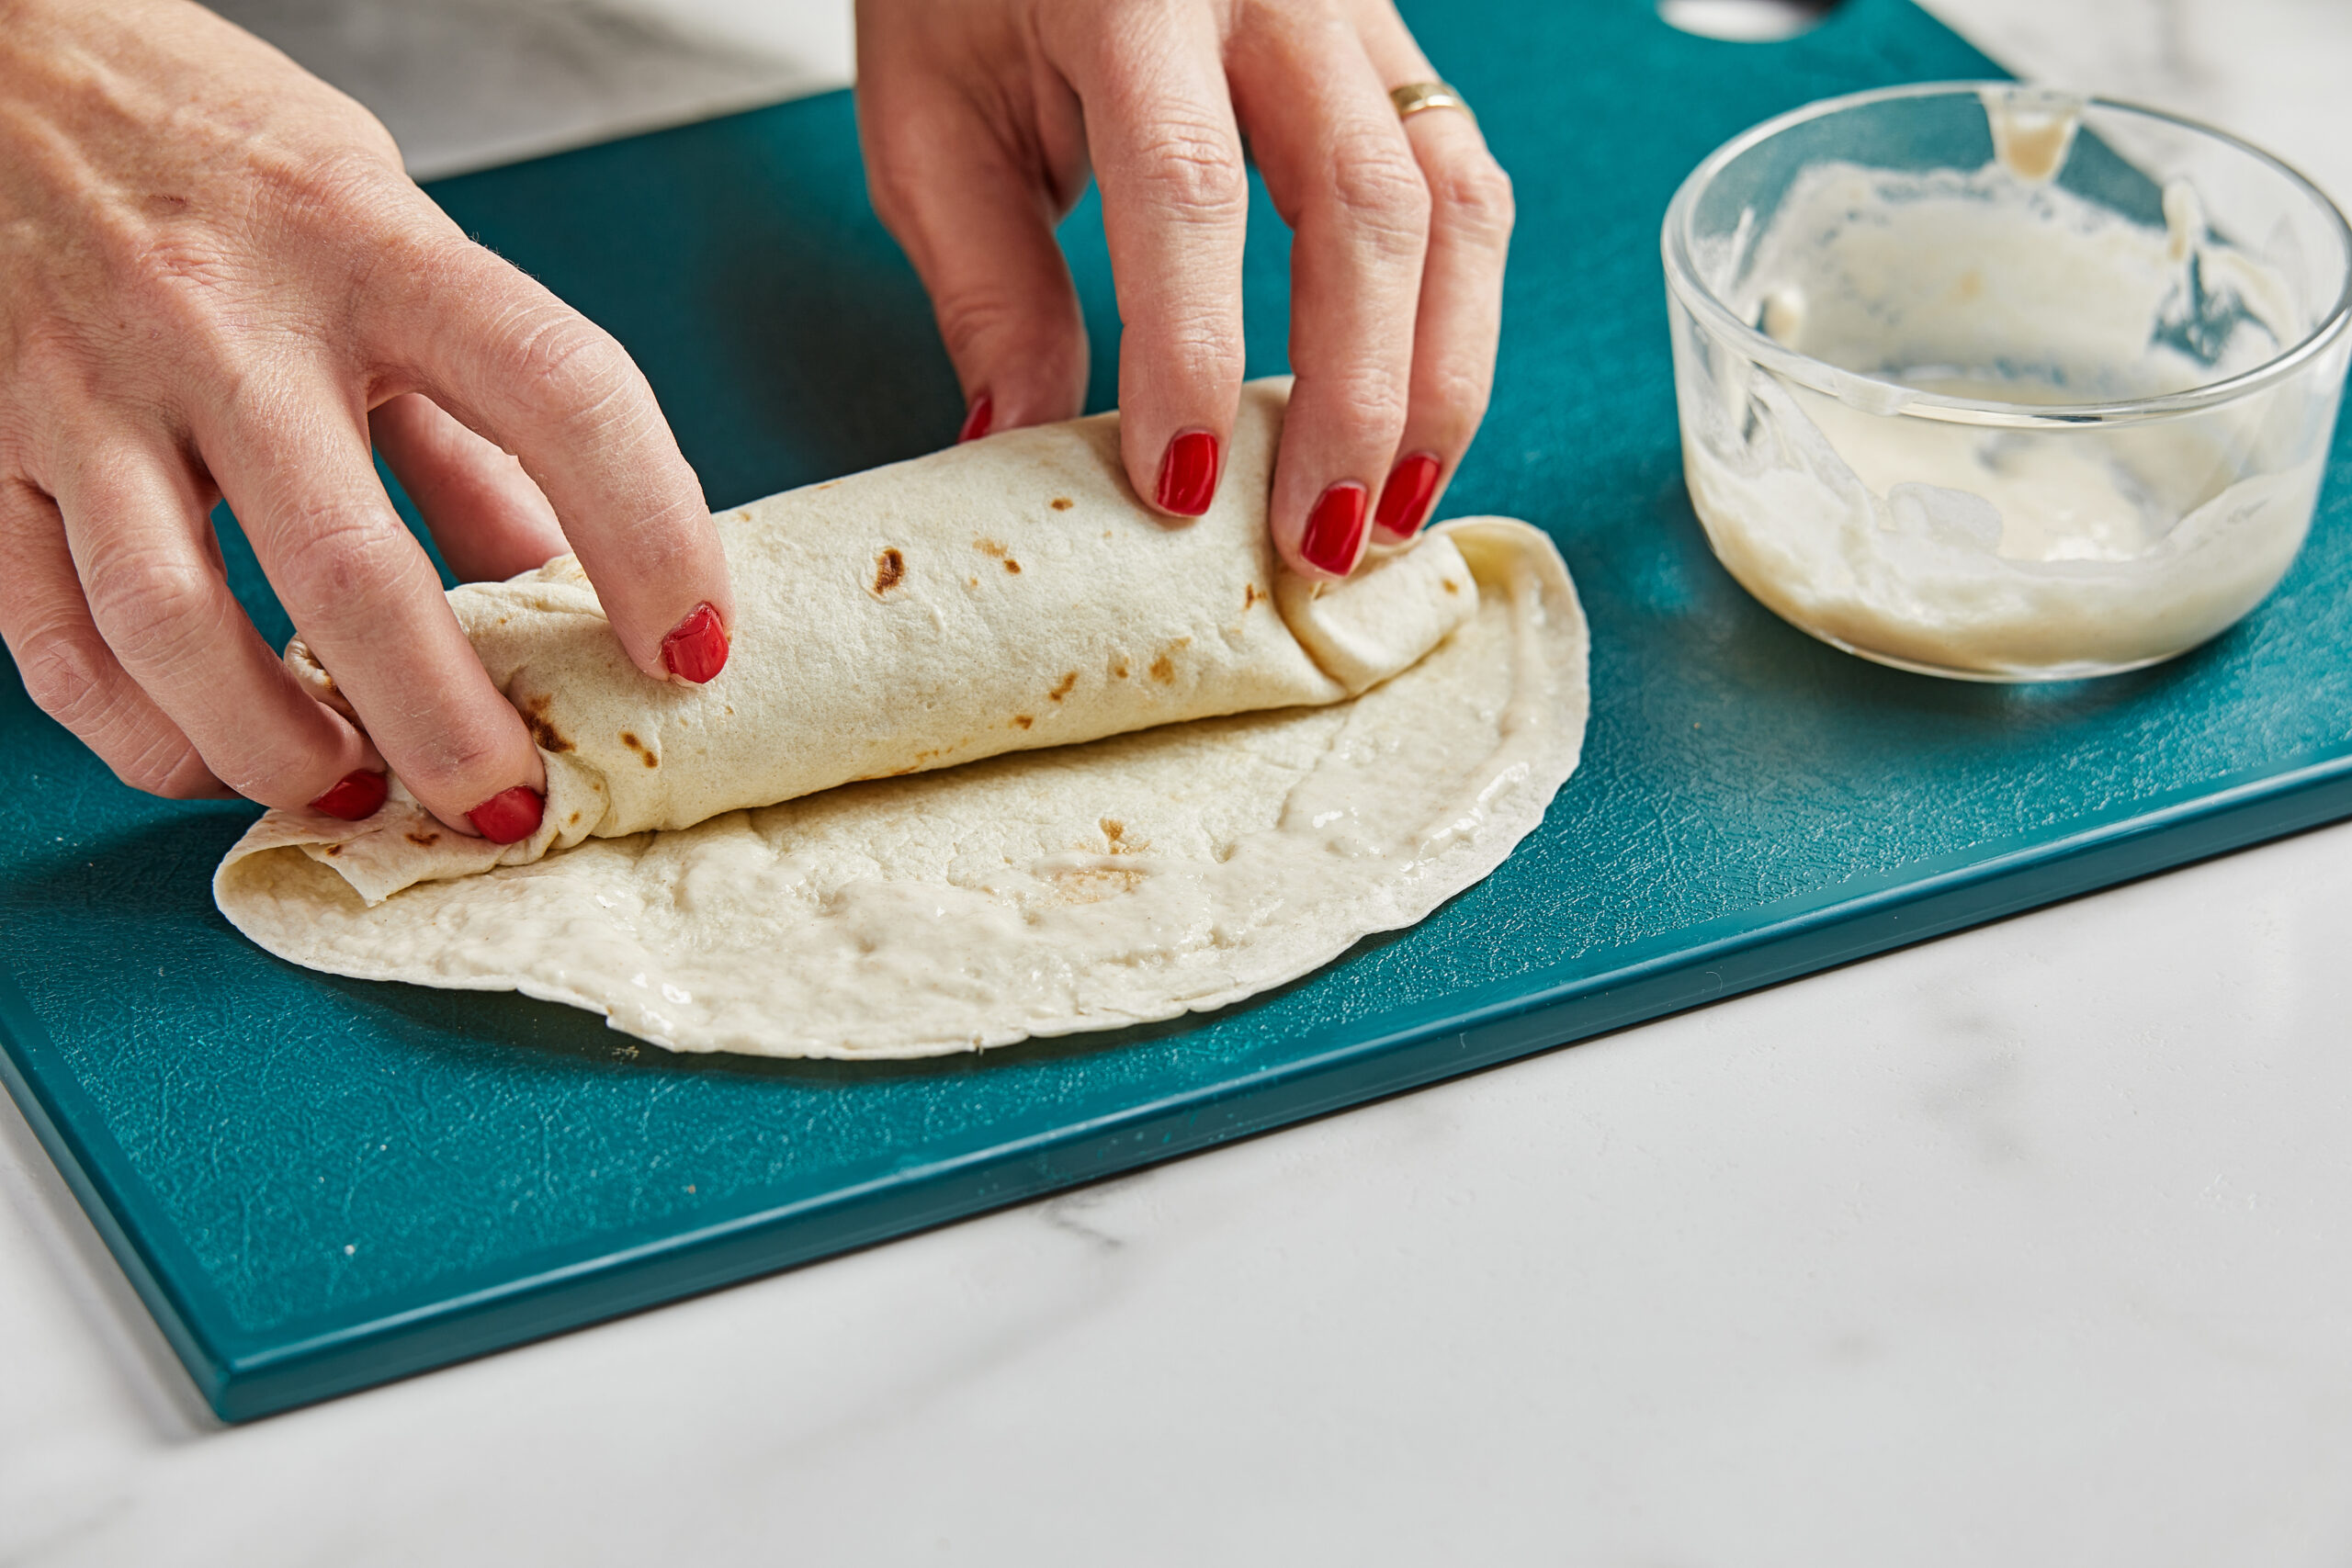
From there, it’s all about the rolling – and sealing, because you don’t want fillings leaking out into that frying oil, do you? I tried a hack I found online that reminded me of grade-school art class, when we made “glue” out of flour and water.
It works like a charm here: You spread the paste on one edge of a tortilla, and when you finish rolling the tortilla around the filling, tucking in the edges as you go, the paste glues the package shut. No toothpicks or skewers needed.
For the frying-avoidant readers out there, let me offer an incentive along with some tips. For the incentive: Know that the oil gets the chimichanga wonderfully crisp on the very outside, leaving the inner layers of tortilla soft, creating the textural contrast that defines the dish. Now the tips:
– To minimise the splattering (and therefore the mess), fry in a Dutch oven or other deep pot rather than a skillet.
– Pay attention to the oil temperature, and adjust the heat to maintain it. That means using a thermometer. When the oil is at 375 degrees Fahrenheit (190 degrees Celsius), the frying happens quickly enough that the tortilla absorbs as little oil as possible, leaving the chimichangas crisp but not greasy. For this recipe, I carefully measured before and after, and the grand total of oil absorbed by four chimichangas was only 1 tablespoon – or 3/4 teaspoon per serving!
– Drain the chimichangas thoroughly after frying. I like to let as much oil as possible drip back into the pot when I lift the chimichanga, and then transfer it to a wire rack set over a sheet pan to catch any further drippings.
– Frying oil can be strained and reused several times before you discard it, and an oil solidifier can make disposal easier (and more eco-friendly) than ever. The most widely available one in stores is called FryAway, and it consists of little flakes that you sprinkle into the oil while it’s still hot. As the oil cools, FryAway solidifies it into a rubbery puck that’s easy to pop cleanly out of the pot and into the trash. (As Consumer Reports found, you can get the same effect for a lower price by buying stearic acid.)
I realise I haven’t convinced some of you, and you probably have a burning question: Can’t these be made in an air fryer? I love my air fryer, too, but I regret to report that unlike my go-to grilled cheeses and glazed tofu and baked potatoes and Brussels sprouts, chimichangas just don’t work well in one.
I tried a few techniques, including brushing them liberally with oil in advance, but every time they turned too hard and/or chewy on the outside. They didn’t taste like chimichangas.
If you just can’t bring yourself to break out the frying oil, I have two suggestions: You could pan-fry them, which takes a little longer and will get you a little crispness, but not as much as going deep. Or you could stop short of that last step altogether, and eat these right after rolling them. There’s no need to curse; just enjoy your burritos.

Chimichangas With Black Beans and Poblano
4 servings
Total time: 45 mins
Make ahead: The filling can be refrigerated for up to 3 days before assembling the burritos. Before frying, you can freeze the assembled burritos in an airtight container for up to 3 months. Defrost in the refrigerator overnight before frying and topping.
Storage: Refrigerate for up to 4 days, preferably without the toppings.
INGREDIENTS
1 tablespoon neutral oil, plus more for frying
2 poblano chiles, stemmed, seeded and chopped
1 small white or yellow onion (6 ounces), chopped
4 cloves garlic, chopped
1 teaspoon ground cumin
One (15-ounce) can no-salt-added black beans, drained and rinsed
1/2 cup Salsa Roja (Red Sauce) (see related recipe), store-bought red or green chile sauce, or enchilada sauce, divided
4 ounces shredded Monterey jack or cheddar cheese, plus more for optional topping
Fine salt
1 tablespoon all-purpose flour
1 tablespoon water
Four (8- to 10-inch) flour tortillas (see related recipe)
Guacamole, sour cream, pico de gallo, shredded lettuce and/or chopped scallions, for optional toppings

STEPS
In a large skillet over medium-high heat, heat the oil until it shimmers. Add the poblanos, onion and garlic and cook, stirring, until the peppers and onion are soft, 6 to 8 minutes. Add the cumin and cook, stirring, just until fragrant, 30 seconds. Add the beans and enchilada sauce and cook until heated through, one to two minutes. Transfer to a bowl and let cool slightly. Stir in the cheese. Taste, and season with salt as needed.
Set a Dutch oven over medium-high heat, and pour in oil to a depth of 1 inch (5 to 6 cups of oil, depending on the size of your Dutch oven). Heat the oil until it registers 375 degrees on an instant-read thermometer.
While the oil is heating, in a small bowl, whisk together the flour and water. (This will be the paste you use to seal the burritos. It can also patch any holes.)
If the burritos are not pliable enough to roll without cracking, stack them on a plate and microwave on HIGH for 20 to 30 seconds, or until warm and soft.
To assemble the chimichangas, lay out a tortilla, and spoon about 1/2 cup of the bean mixture onto the tortilla, about one-third of the way up from the bottom. Use a brush or your fingers to spread the flour slurry along the upper edge of the tortilla.
Fold the tortilla over the filling from the bottom, tucking it in to form a cylinder, then fold the sides over and continue rolling from the bottom, keeping the sides tucked and trying to keep the package as tight as possible.
Press the seam to help seal. Repeat with the remaining tortillas and filling, setting them seam side down on a plate as you work.
Set a wire rack over a large sheet pan next to the stove.
Once the oil has reached 375 degrees Fahrenheit, carefully lower two burritos into the oil (using tongs if necessary). Let the oil return to 375 degrees Fahrenheit, adjusting the heat as needed to maintain the temperature, and fry the burritos until golden and crisp all over, turning them as needed, about five minutes.
(The burritos tend to want to stay seam-side down, so you might want to use the tongs to hold them in place after turning.)
Transfer to the wire rack to drain and cool for about 10 minutes. Return the oil to 375 degrees Fahrenheit and repeat with the remaining burritos.
Transfer the chimichangas to a serving platter or individual plates, dollop and sprinkle with the toppings of your choice, and serve warm. – Joe Yonan


